Jul 4, 2024
A Guide About How to Wrap a Motorcycle
Customizing the look of a motorcycle with a vinyl wrap is an excellent way to give your ride a personal touch in 2024. Not only does wrapping allow for endless creativity with patterns and finishes, but it also serves as a protective barrier for the bike’s paint. How to wrap a motorcycle? This guide breaks down the process into manageable steps, helping even beginners achieve a professional finish.
Initial Preparations: Laying the Foundation for a Smooth Wrap
Thorough Cleaning: The First Vital Step
A successful motorcycle wrap hinges on starting with a clean slate. Dirt or grime can cause imperfections in the wrap, so use a high-quality degreaser or isopropyl alcohol to scrub every nook and cranny. Pay close attention to crevices where dirt tends to accumulate. After a thorough cleaning, ensure the motorcycle is completely dry before proceeding.
Disassembly for Better Results
To achieve the neatest wrap possible, you’ll need to disassemble parts of the motorcycle to create an unobstructed workspace. Carefully remove parts such as side panels, fenders, tanks, and any accent pieces. Keep track of hardware and store it safely to avoid any hiccups during reassembly. While this step requires extra effort, it results in an improved finish that looks seamless and professional.
Selecting Your Materials: Matching Wrap Quality with Designs
Vinly Quality Matters
While shopping for wrap materials, keep in mind that not all vinyl is created equal. High-quality vinyl is a must, as it’s durable and more flexible, which is crucial for molding around the complex shapes of a motorcycle. Premium vinyl will often factor in various levels of UV protection as well, ensuring the wrap maintains its color even under constant sun exposure.
Personalized Designs and Finishes
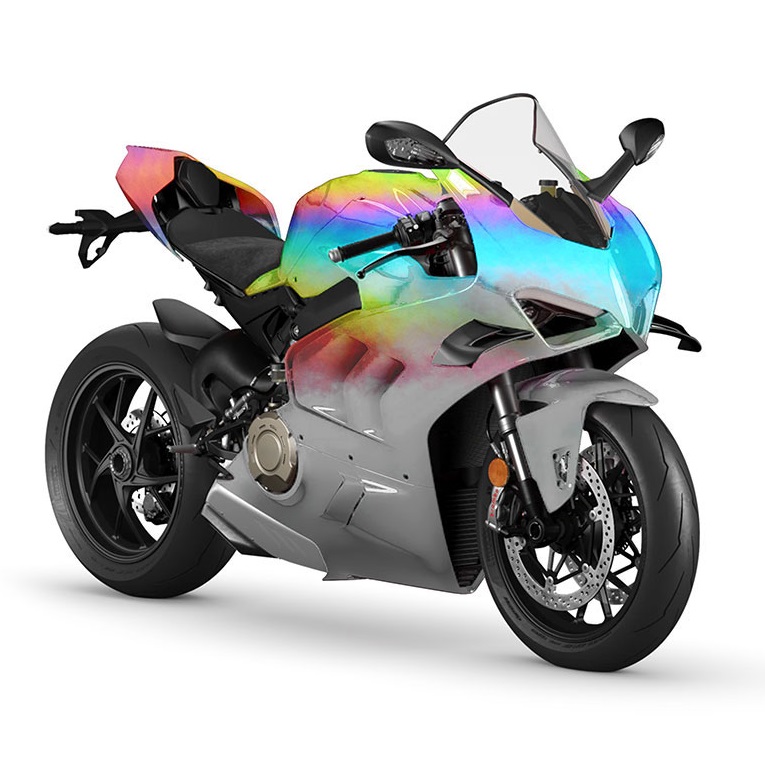
The wrap’s design and finish reflect your personal style and can dramatically alter the bike’s appearance. From vivid colors to realistic textures, the options are vast. When choosing a finish, whether it be glossy for a classic shine or matte for a modern edge, consider how it will complement the existing components and overall design of the motorcycle. It’s also wise to buy extra material to account for potential mistakes or future repairs.
Application Techniques: Precision and Patience
Skillful Cutting and Initial Application
Using care, measure and cut the vinyl into sections that not only cover the target areas but also offer enough overlap for adjustments and errors. Peel off the backing, expose the adhesive side, and gently place the vinyl onto the bike’s surface, beginning in the middle and working your way out to avoid creating air pockets.
The Heat Gun’s Role in Contouring
When dealing with the bike’s contours and edges, a heat gun becomes an essential tool. Gently heating the vinyl makes it pliable, allowing it to stretch and conform to the motorcycle’s curves. Use a squeegee to eliminate air bubbles and wrinkles, working slowly to ensure a flush fit across the surface. This step demands meticulous attention to detail, but the result is a professional-looking wrap.
Final Touches: Ensuring a Lasting Finish
Precise Trimming Techniques
Now, with the vinyl in place, precision trimming is necessary to remove excess material. A sharp utility knife or specialty blade is paramount for clean cuts, particularly around intricate parts like bolts and lights. Exercise caution to avoid scratching the motorcycle’s actual bodywork.
Securing the Edges
After trimming, firmly apply heat to the edges. This post-heating process is crucial for promoting lasting adhesion, especially in areas susceptible to wear and tear. Pay particular attention to seams and transitions, as securing these areas can significantly extend the wrap’s lifespan.
Maintaining the Look: Caring for Your Wrap
Regular Cleaning Habits
Once your motorcycle is wrapped and looking sharp, routine maintenance is vital for preserving its appearance. Gently wash the wrap using a soft cloth and a mild cleaning solution to prevent discoloration or damage. Avoid high-pressure washing and harsh chemicals, which can lift edges or cause the vinyl to crack.
Vigilant Inspections and Repairs
Keep an eye on your wrap, especially after rides, checking for any signs of lifting or damage. Addressing small issues promptly can prevent them from worsening. Keep some of the vinyl used for your project on hand for quick patches or touch-ups when needed. For significant damage or wear, you may need to consider replacing the wrap, especially if it compromises the overall look or protection of the motorcycle.
Initial Preparations: Setting the Stage for a Flawless Application
Deep Cleaning: Ensuring a Spotless Canvas
A spotless canvas is crucial for a bubble-free and long-lasting wrap. Use specialty automotive cleaners to remove all traces of wax, oil, and road grime from the motorcycle. Apply elbow grease to areas with stubborn dirt to avoid any imperfections that could show through the wrap or cause adhesion issues.
Disassembling for Perfection
The key to a snug, seamless wrap job lies in accessing every curve and angle of the bike. Disassemble parts such as fairings, gas tanks, and any detachable hardware. This step allows you to wrap pieces individually, which results in a more polished appearance and is well worth the additional effort.
Choosing the Wrap: Matching Quality with Vision
Prioritizing High-Caliber Vinyl
Choosing high-quality vinyl is non-negotiable. Inferior materials are prone to tearing, peeling, and fading, leading to a subpar appearance and a waste of effort. Opt for reputable brands that promise longevity and resilience against the elements. Remember, though quality may come at a price, the investment pays off in durability and finish.
Designing Your Motorcycle’s New Look
Whether it’s a matte black stealth look, a bright metallic finish, or a custom-designed graphic, the wrap you choose will become the bike’s new identity. Take the time to sift through options, considering how the wrap’s texture and sheen will interact with different lighting conditions and the bike’s natural lines. A good practice is to visualize the design in various environments, ensuring the final choice meets your aesthetic goals in all settings.
The Wrapping Process: Where Precision Meets Patience
Preparing and Applying Sections of Vinyl
Pre-cut vinyl sections with additional space around the edges to ensure full coverage of each part. Peel back the vinyl’s protective layer, and carefully align it on the motorcycle’s surface, starting at a central point. Use a squeegee to press the vinyl down, working outwards, and eliminate any air that might get trapped beneath.
Molding the Vinyl with Heat
When approaching complex shapes and tight angles, the vinyl will need to be softened with a heat gun. The heat will increase its pliability, making it easier to stretch and conform to the motorcycle’s body. Manipulate the vinyl patiently, and don’t overheat, which can cause the material to wrinkle or distort. This is often the most time-consuming step, but it’s crucial for the best fit.
Finalizing the Wrap: Trimming and Sealing Edges
Cutting with Precision
Once the vinyl adheres to the motorcycle, precise trimming is imperative. A sharp knife or vinyl cutter must be used with care, following the shape of the component closely. Trim the excess material leaving enough to tuck behind or under adjacent parts for a cleaner look.
Ensuring Proper Adherence
The final wrap appearance is dependent on firmly sealed edges. After trimming, apply heat around the entire edge of the wrapped part, using a squeegee to press and seal the vinyl into place. This post-heating process will activate the vinyl’s adhesive properties and help secure the wrap to withstand the rigors of the road.
Post-Application Care: Preserving the Wrap’s Integrity
Routine Cleaning and Maintenance
A consistent cleaning regimen will keep the wrap looking pristine. Use gentle cleaners and a soft microfiber cloth to wipe away dirt and grime regularly. Avoid abrasive tools or power washers, which are likely to damage the wrap.
Addressing Wear and Tear
Regular inspections will reveal any wear, tear, or lifting edges. Tackle these areas immediately with small vinyl pieces for repairs, which prevent a minor issue from becoming a glaring blemish. Consulting a professional can also ensure the longevity of your wrap if larger concerns arise.
The Communal Aspect: Sharing the Experience
Connection with Local Wrapping Community
Engaging with a local motorcycle community that has wrapping experience can provide invaluable insights. Learning from those who have mastered the process can result in a smoother application and maintenance advice.
Social Media and Forums as Resources
Utilize online motorcycle forums and social media groups for support. These platforms offer tutorials, troubleshooting tips, and inspiration for designs, enhancing your wrapping project’s success.
Upkeep and Long-term Care: A Commitment to the Wrap
Scheduling Regular Assessments
Set up a routine to regularly inspect the wrap a motorcycle. Keeping on top of any peeling or weathering early on ensures your motorcycle consistently looks its best and protects the investment made into wrapping.
Protecting Your Wrap
Consider protective measures beyond cleaning, such as storing the motorcycle out of harsh weather when not in use, or using specialized sealants designed for vinyl wraps, to add an extra layer of protection against the elements.
Wrapping a motorcycle can be an enriching project, resulting in a one-of-a-kind appearance while adding a layer of protection. By thoroughly cleaning and disassembling the bike, using quality materials, and applying the wrap with accuracy, riders can achieve impressive results. Post-application care will keep the motorcycle looking immaculate for years to come. Remember, the process requires patience and a bit of practice, but the reward is a customized motorcycle that stands out with a fresh, personalized look.
More Details