Dec 3, 2024
How to Clean Motorcycle Helmet: Tips and Tricks
Cleaning your motorcycle helmet is not just about aesthetics; it’s essential for safety and comfort. A clean helmet enhances visibility and ensures that your helmet can protect you effectively by providing a clear view and better air circulation. Here’s a comprehensive guide on how to clean motorcycle helmet effectively.
The Importance of Regular Helmet Cleaning
Maintaining the cleanliness of a motorcycle helmet is crucial not only for the appearance but for safety and longevity as well. Dirt, grime, and debris can accumulate on both the exterior and the inner linings of a helmet. This not only degrades the material but can obstruct visibility if the visor is not clean. Regular cleaning ensures the helmet remains effective in protecting you and maintains its condition, maximizing its lifespan.
Regular cleaning prevents build-up of bacteria and odors especially on the interior where it contacts skin, hair, and sweat. Without proper cleaning, these elements can lead to the deterioration of the helmet’s lining materials, which might compromise its comfort and safety. In essence, a clean helmet guarantees a safer and more pleasant riding experience, ensuring that all focus remains on the road without distractions linked to discomfort or reduced visibility due to unclean surfaces.
Essential Cleaning Supplies for Your Helmet

Before diving into the process of cleaning your motorcycle helmet, it’s vital to gather the appropriate supplies. Quality cleaning extends the life of your helmet and ensures that it remains a reliable piece of safety gear. So what do you need to ensure an effective clean? Here are some of the essentials:
- Microfiber cloths are gentle on your helmet’s surfaces while effectively removing dirt.
- Baby shampoo or a mild cleaner safeguards the helmet’s materials from harsh chemicals.
- A toothbrush helps you reach into crevices and vents without causing damage.
- Warm water acts as a base for your cleaning solution and helps to loosen grime.
- For a deep clean of the interior, consider a helmet interior cleaner like Motul M2.
- A visor spray, such as Muc Off, is useful for cleaning the faceshield without scratches.
Remember to avoid strong solvents, petroleum-based cleaners, and ammonia-based products as they can degrade the helmet’s materials.
Removing Helmet Accessories Before Cleaning
Prior to starting the cleaning process, take the time to remove all helmet accessories. This means unplugging any attached electronics, like intercom systems, and taking off mounted cameras or other devices. If your helmet includes a sun peak or additional visors, detach these as well. Such accessories can often be cleaned separately and require different care than the helmet itself.
By removing these accessories, you not only safeguard their function but also ensure that you can clean every part of the helmet without obstruction. Remember, a comprehensive clean-up is key to maintaining optimal function and safety of your motorcycle helmet.
Preparing Your Helmet for Cleaning
Before you start the cleaning process, it’s important to prep your helmet correctly. This ensures you don’t damage any parts and that every section gets thoroughly cleaned. Here’s what you should do:
- Remove any electronics, such as Bluetooth intercoms, cameras or headsets.
- Take off any removable parts like sun peaks or additional visors. This will make them easier to clean separately.
- Extract the interior padding, if possible. This includes cheek pads and liners.
- Find a clean, flat surface to work on where you can lay out the helmet and its parts.
Cleaning the Exterior of the Helmet
To clean your helmet’s exterior effectively:
- Start by wetting a microfiber cloth in warm water.
- Place the cloth on the helmet to loosen dirt and grime for about 10 minutes.
- Gently wipe the helmet with the cloth, using a circular motion.
- Use a toothbrush for small cracks and crevices.
Remember not to use harsh soaps that could damage the helmet’s finish.
Detailed Cleaning of the Faceshield and Vents
The faceshield and vents require their own cleaning steps:
- Apply a visor cleaner like Muc Off to the faceshield.
- Gently wipe with a soft microfiber cloth in one direction to avoid scratches.
- Clean the vents with a toothbrush to remove any dust or debris.
By following these steps, you’ll ensure a safer, cleaner riding experience.
Interior Cleaning: Techniques for Removable and Non-Removable Linings

Proper interior cleaning is crucial for maintaining your motorcycle helmet. Different linings require different approaches. Here’s how to handle both removable and non-removable linings effectively.
Cleaning Removable Linings
If your helmet has removable interior pads or linings, the cleaning process is simpler. Follow these steps:
- Remove the linings and pads. Carefully take out the cheek pads, crown liner, and any other removable parts.
- Prepare a cleaning solution. Use warm water mixed with a small amount of baby shampoo. This blend is gentle yet effective.
- Hand wash the linings. Soak and gently scrub the pads in the solution. Use a soft brush for stubborn dirt.
- Rinse thoroughly. Ensure all soap is removed by rinsing the linings under running water.
- Air dry. Lay the pads flat to dry completely in a well-ventilated area away from direct sunlight.
Cleaning Non-Removable Linings
Cleaning non-removable linings takes more care. Use these steps to avoid damaging your helmet:
- Create a gentle cleaning solution. Mix baby shampoo with lukewarm water in a spray bottle.
- Dampen the interior. Lightly spray the inside of the helmet, focusing on the lining.
- Gently scrub. Use a soft cloth or a soft-bristled brush to clean the lining.
- Wipe with a damp cloth. Remove any soapy residue with a clean, damp cloth.
- Dry carefully. Let the helmet air dry in a cool, shaded place. Avoid using heat sources.
For both cleaning methods, always ensure that the linings are completely dry before reassembling the helmet. This prevents mildew and ensures comfort during your rides.
Drying and Reassembling Your Helmet After Cleaning
After cleaning your motorcycle helmet, drying it correctly is key to prevent mold and keep it fresh. Don’t rush this part. Follow these steps to ensure proper drying and reassembly:
- Air Dry Completely. Place all parts of your helmet and its linings in an airy, shaded location. Avoid direct sunlight or heat sources, as they can warp or damage the material.
- Patience is Key. Give your helmet plenty of time to dry. It may take several hours or even a full day.
- Check for Dampness. Before reassembly, make sure every piece is dry. Any leftover moisture can lead to mildew or odors.
- Reassemble Carefully. Once dry, put the parts back in their correct places. Fit the cheek pads, liner, and any other interior padding snugly.
- Reattach the Visor. Place the cleaned visor back on the helmet. Ensure it’s secure and operates smoothly.
- Re-install Accessories. If you removed a Bluetooth device, camera, or other electronics, now is the time to attach them back.
By taking the time to dry and reassemble your helmet the right way, you maintain its integrity and readiness for your next ride.
Keeping Your Helmet Clean: Maintenance Tips
Keeping your helmet clean is not a one-time job. Regular maintenance is essential for ensuring its longevity. Use these practical tips on how to clean motorcycle helmet regularly. Good maintenance keeps your helmet in top shape between deep cleans. Here are some quick tips:
- Wipe Down After Rides: Use a soft cloth to wipe the exterior after each ride.
- Spot Clean: Address any dirt or bugs on the visor immediately to prevent stains.
- Air Out: After riding, let your helmet air out to reduce moisture inside.
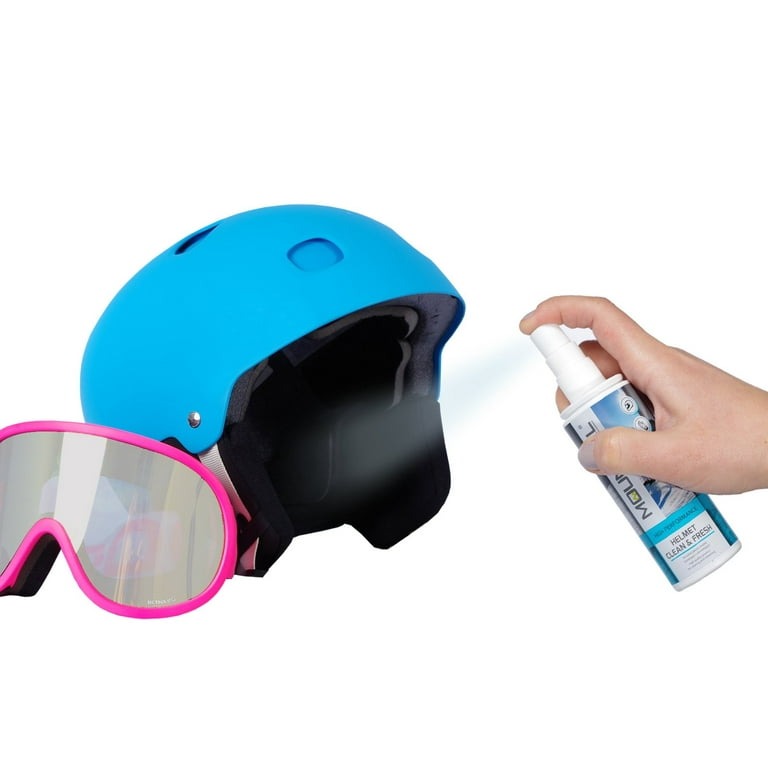
- Use Helmet Spray: Between washings, freshen up with a helmet interior spray.
- Avoid Heat: Store your helmet in a cool, dry place away from direct heat.
- Regular Checks: Examine the helmet for scratches or damage regularly, to maintain safety.
By following these simple maintenance steps regularly, you help extend the life of your helmet and ensure it’s always ready for your next ride.
When to Replace Your Helmet

While knowing how to clean motorcycle helmet is essential for maintenance, it’s equally important to recognize when it’s time for a replacement. Here’s a guide to help you identify potential replacement criteria.
- Expiration Date: Most helmets have an lifespan of about five years, regardless of how well they’ve been cared for. Always check the manufacturer’s guidelines.
- Signs of Wear and Tear: Look for structural damage, such as cracks in the shell or significant wear in the inner padding. If anything looks compromised, it’s time to consider a new helmet.
- Impact History: If your helmet has been involved in an accident or dropped, even if there are no visible signs of damage, it’s crucial to replace it. Helmets are designed to absorb shocks, and their effectiveness can be compromised after an impact.
- Comfort Issues: If you notice discomfort due to padding breakdown or insufficient fit, it might be time to invest in a new helmet.
Being aware of when it’s time to replace your helmet can be as critical as knowing how to clean motorcycle helmet. This approach ensures that you are always well-protected while riding.
More Details