Mar 5, 2025
How to Clean Helmet: Helmet Cleaning Tips for Bikers
Preparing Your Helmet for Cleaning
To ensure a thorough clean, preparing your helmet is key. Here’s what you need to do:
- Remove any accessories. This includes camera mounts, intercoms, or stickers that can hinder cleaning.
- Take out the lining. If the helmet’s interior is removable, carefully take out the padding and lining. Check the manufacturer’s manual to do this right.
- Wipe off loose dirt. Use a soft, dry cloth to gently wipe away any surface dirt or debris.
- Create a workspace. Arrange a clean area with enough space to work and lay out the helmet parts.
This preparation phase will make the actual cleaning process much more effective. During the prep, remember to handle your helmet with care to avoid any damage. Next, we’ll go through the materials you need to get started with how to clean helmet properly.
Essential Materials Needed for Helmet Cleaning
Before you dive into the task of how to clean helmet, you need the right tools. Start with these basics:
- Microfiber Cloth: Choose a soft microfiber cloth for wiping the helmet. It won’t scratch the surface.
- Mild Detergent: A mild liquid soap or baby shampoo works well. Harsh chemicals can damage helmet materials.
- Soft Bristled Brush: Use a brush for stubborn grime. Ensure the bristles are soft to prevent scratches.
- Bucket or Basin: Have a container handy for mixing your cleaning solution.
- Sponge or Soft Rag: These are for gentle application of soap and water over the helmet’s exterior.
- Towel: Keep a dry towel nearby for drying your helmet after the wash.
- Water: You’ll need plenty of clean, lukewarm water for rinsing.
With these materials at hand, you’re set to tackle the task of helmet cleaning with ease. Up next, we’ll walk through a step-by-step guide for cleaning the exterior of your helmet.
Step-by-Step Guide to Cleaning the Helmet Exterior
Once you have all your materials ready, follow these steps to learn how to clean helmet exteriors efficiently:
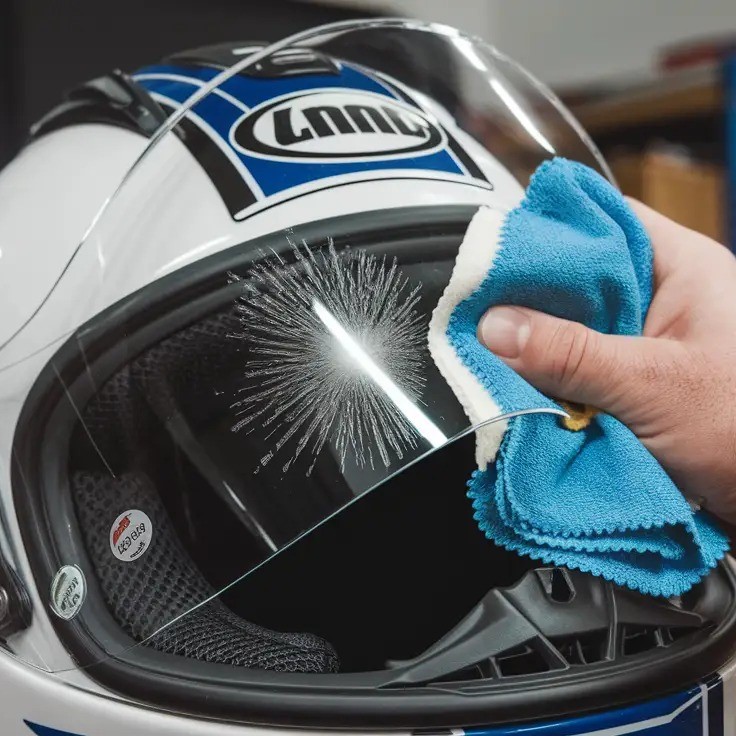
- Start with the visor. First, gently remove the visor or face shield from your helmet. Use your soft cloth with a bit of water to clean any dirt or bugs off the visor. Be gentle to prevent scratches.
- Wash gently. Dampen your sponge or soft rag with the water and mild detergent mixture. Clean the helmet’s surface with light circular motions, focusing on areas with visible grime.
- Scrub softly. For persistent spots, use the soft-bristled brush lightly dipped in soapy water. Scrub softly to avoid scratching the helmet’s paint or finish.
- Rinse carefully. With clean, lukewarm water, rinse the helmet thoroughly. Make sure there’s no soapy residue left after rinsing.
- Dry the surface. After rinsing, use your towel to gently dry the helmet. Pat down the surface rather than rubbing, to avoid any damage.
- Clean vents and crevices. Use wet cotton swabs to clean hard-to-reach places like air vents and decorative ridges.
- Wipe for finish. Finally, use a fresh microfiber cloth to wipe the helmet dry. This will give it a nice shine and ensure there’s no water spotting.
By following these steps, your helmet should look as good as new. Remember to take your time and handle your helmet gently through each step.
Tips for Cleaning the Helmet Interior
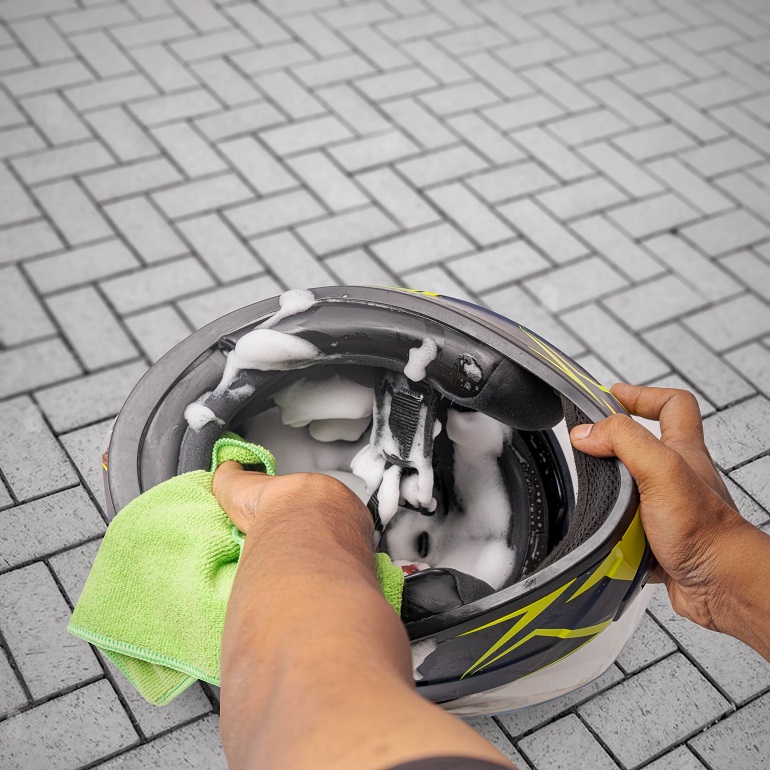
Cleaning the helmet interior is crucial for a fresh riding experience. Here’s how you can do it:
- Remove the padding. Take out all removable parts like pads and lining.
- Check manufacturer instructions. Some interiors are machine washable, others are not.
- Hand wash gently. If washing by hand, use mild detergent and lukewarm water.
- Use a sponge. A soft sponge will prevent damage to delicate interior fabrics.
- Rinse thoroughly. Make sure no soap remains before drying.
- Air out the parts. Let the pads and lining air-dry, avoiding direct sunlight.
- Avoid heat. Don’t use a hairdryer or radiator, as heat can harm helmet materials.
By following these simple steps, you’ll ensure a clean and comfortable helmet. Regular interior cleaning will extend your helmet’s life and enhance your biking experience.
Drying and Reassembling Your Helmet
After you have cleaned your helmet, drying and reassembling it properly is crucial. Follow these tips:
Properly Drying Your Helmet
- Air dry thoroughly. Place the helmet and its parts in an airy space.
- Avoid sunlight. Keep them away from direct sun to prevent material damage.
- Do not use heat. Heat sources like blow dryers can warp helmet components.
- Pat down internals. Gently press pads with a towel to soak up extra moisture.
Once everything is dry, you can begin to put your helmet back together:
Reassembling Your Helmet Correctly
- Check the manual. Use your helmet’s guide to fit parts correctly.
- Start with the interior. Place the dry lining and pads back into the helmet.
- Attach the visor. Secure the face shield or visor as it was before cleaning.
- Ensure functionality. Make sure vents and clips work as intended.
By taking care to properly dry and reassemble your helmet, you maintain its integrity and ensure your safety on the road. Regular maintenance is key, so remember these steps for next time you learn how to clean helmet. Next, we’ll delve into how to maintain helmet cleanliness between washes.
Maintaining Helmet Cleanliness Between Washes

Keeping your helmet clean between washes is key to extending its lifespan and ensuring it smells fresh. Here are some practical tips on how to clean helmet interiors and exteriors without going through a full wash cycle.
Regular Wiping Down
To minimize dirt buildup, wipe the exterior with a microfiber cloth after every ride. Use it dry or slightly dampened to remove dust and grime.
Interior Padding Refresh
After removing your helmet, shake out the interior lining to dislodge any loose dirt. If the padding is removable and not washable, use a damp cloth with mild detergent to spot clean and then air dry.
Ventilation is Crucial
Always store your helmet in a well-ventilated area. Good airflow helps keep the interior dry and odor-free.
Use Helmet Sanitizer Sprays
Between deep cleans, use sanitizer sprays designed for helmets. They help in eliminating bacteria and providing a pleasant smell.
Sweat Absorption Tactics
If you sweat heavily, consider wearing a headscarf or bandana to absorb moisture. This practice can keep the interior cleaner for longer.
Quick Fixes for Smell
For a quick freshness boost, lightly sprinkle baking soda inside the helmet and let it sit overnight. Vacuum it out the next day for a fresher interior.
By following these steps, you can maintain your helmet’s cleanliness between washes and enjoy a better riding experience.
Natural Cleaning Solutions for Helmets
When thinking about how to clean helmet, it’s great to consider eco-friendly options. Natural solutions are gentle on the helmet and kind to the environment. Let’s explore options that you can easily find at home:
- White Vinegar and Water: Mix equal parts of white vinegar and water. This blend is effective for wiping down the helmet’s exterior and interior padding.
- Baking Soda: Great for removing odors. Sprinkle baking soda inside your helmet and leave it overnight. Vacuum it out the next morning for a fresh scent.
- Lemon Juice: Lemon juice is a natural degreaser. Use it mixed with water to clean oily residues from your helmet.
- Tea Tree Oil: Known for its antibacterial properties. Add a few drops to water and use it to wipe down the helmet after a ride for a clean and fresh feel.
- Coco Glucoside: This mild and natural cleanser can be diluted in water for a gentle wash. It’s perfect for sensitive surfaces.
- Baby Wipes: Hypoallergenic baby wipes are a quick and effective way to clean your helmet on the go.
Remember, choosing natural methods not only protects your helmet but also safeguards your health and the planet. These natural cleansers can be a primary part of your helmet care routine, ensuring a fresh and ready-to-use helmet for every ride.
Common Mistakes to Avoid When Cleaning Helmets
Learning how to clean helmet is essential. Yet, it’s just as crucial to know what not to do. To keep your helmet in top shape, avoid these common mistakes:
- Using Harsh Chemicals: Don’t clean your helmet with strong solvents or cleaners. They can damage the helmet’s materials.
- Exposing to High Heat: After washing, never dry your helmet in direct sunlight or with a hairdryer. This can weaken the structure.
- Soaking the Helmet: Submerging your helmet in water can seep into the inner materials. This can degrade the helmet’s protective capabilities.
- Rushing the Drying Process: Allow your helmet to air dry completely. Patience ensures moisture doesn’t linger and cause mold or mildew.
- Scrubbing Too Hard: While cleaning the exterior, gently scrub to prevent scratches. Soft brushes and sponges are best.
- Ignoring the Manufacturer’s Instructions: Always check the handbook. It gives specific care instructions for your helmet.
- Neglecting the Visor: Treat the visor with care. Use only soft cloths and avoid abrasive materials that can scratch.
- Forgetting to Rinse Thoroughly: Rinse until all soap is gone. Soap residue can cause skin irritation.
- Not Cleaning Regularly: A sporadic clean won’t cut it. Regular cleaning prevents dirt build-up and bacteria growth.
By avoiding these mistakes, you will extend the life of your helmet and ensure it offers maximum protection on each ride.
More Details