Jul 9, 2024
How to Check Your Motorcycle Oil?
Your motorcycle’s engine is a finely-tuned machine, and its lifeblood is the oil that lubricates and protects its moving parts. Regular oil checks aren’t just a good idea; they’re essential for maintaining your bike’s performance, longevity, and safety. How to check motorcycle oil? Ignoring your motorcycle’s oil level can lead to costly repairs, decreased performance, and even engine failure. So, grab your wrench and let’s dive into the world of motorcycle oil checks!
When to Check: Timing is Key
Checking your oil regularly is key to keeping your motorcycle running smoothly. But when is the best time to do it? The answer depends on your riding habits and the type of oil your bike uses. As a general rule of thumb, check your oil:
Before every ride:
A quick check before you hit the road can help you catch any potential issues early on.
Weekly for regular riders:
If you ride your motorcycle frequently, aim to check your oil at least once a week.
Monthly for occasional riders:
If you only ride occasionally, a monthly check is usually sufficient.
After long rides:
If you’ve been on a long ride, it’s a good idea to check your oil to make sure it hasn’t been depleted.
Engine Temperature Matters
The temperature of your engine also plays a role in accurate oil readings. Most motorcycles require you to check the oil level when the engine is warm. This means letting your bike run for a few minutes before checking, allowing the oil to circulate and settle properly.
How to Check: Two Common Methods
How to check motorcycle oil? There are two primary ways to check your motorcycle’s oil level:
Sight Glass
Many modern motorcycles are equipped with a sight glass, a small window on the side of the engine. This allows you to easily see the oil level without having to remove any parts. Simply hold your motorcycle upright, locate the sight glass, and check if the oil level falls within the indicated range.
Dipstick
If your motorcycle doesn’t have a sight glass, it likely has a dipstick. This is a long, thin metal rod that’s inserted into the engine to measure the oil level. Locate the dipstick, usually near the oil fill cap, remove it, wipe it clean, reinsert it fully, and then remove it again. The oil level should be between the two lines on the dipstick.
What to Look For: Beyond the Level
Checking your oil isn’t just about ensuring the level is correct. It’s also an opportunity to assess the oil’s condition. Pay attention to the following:
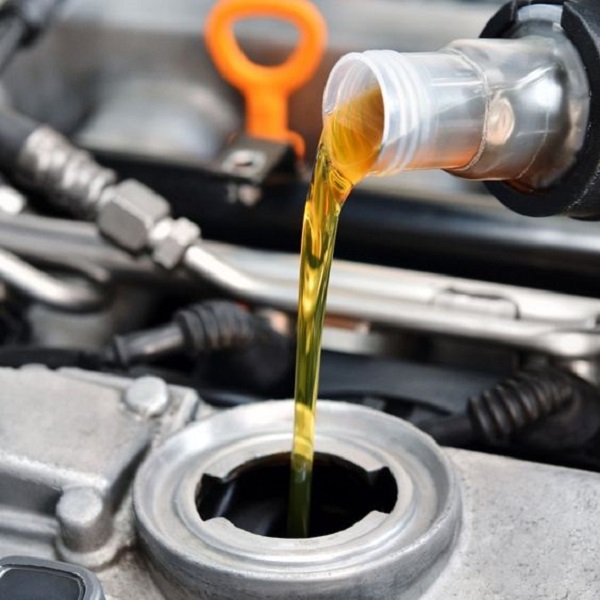
- Color: Fresh oil is usually a light amber color. If it’s dark or black, it’s time for an oil change.
- Consistency: Oil should be smooth and slightly slippery. If it feels gritty or thick, it’s likely contaminated and needs to be changed.
- Smell: Oil should have a mild, slightly sweet smell. If it smells burnt or sour, it’s a sign of engine problems.
If you notice any metal shavings on the dipstick or in the sight glass, it’s a sign of engine wear and tear. Consult a mechanic immediately to diagnose and address the issue.
Topping Up or Changing Your Oil
If your oil level is low, you’ll need to top it up. Use the same type and brand of oil that’s already in your engine, and add it slowly to avoid overfilling.
If your oil is dirty, contaminated, or if it’s been a while since your last oil change, it’s time for a fresh batch. Consult your motorcycle’s owner’s manual for the recommended oil change interval and the correct type of oil to use.
Common Mistakes to Avoid
When checking your motorcycle’s oil, it’s important to avoid these common mistakes:
- Checking on a slanted surface: Always park your motorcycle on level ground before checking the oil.
- Not wiping the dipstick clean: A dirty dipstick can give you an inaccurate reading.
- Overfilling the oil: Adding too much oil can cause problems for your engine.
Beyond the Basics: Additional Tips
- Use the correct tools: Invest in a good quality wrench to remove the oil fill cap and dipstick.
- Wear gloves: Oil can be messy, so wear gloves to protect your hands.
- Dispose of old oil properly: Don’t dump used oil down the drain. Take it to a recycling center or auto parts store.
By regularly checking and maintaining your motorcycle’s oil, you’re ensuring its peak performance, longevity, and safety. Remember, a little maintenance goes a long way in keeping your two-wheeled companion running smoothly for years to come.
Safety First: Essential Precautions
Before you begin your oil check, prioritize safety. Ensure your motorcycle is parked on a level surface and the engine has been off for a few minutes to allow the oil to settle. This ensures an accurate reading. Wear gloves to protect your hands from hot engine parts and oil spills. Have a rag handy to wipe off any excess oil.
Understanding Oil Viscosity and Grades
Not all motorcycle oils are created equal. Different engines require different types of oil based on their design and operating conditions. Oil viscosity, which refers to its thickness or flow resistance, is a crucial factor.
- Thinner oils (lower viscosity): Flow more easily in cold temperatures and are often recommended for winter riding.
- Thicker oils (higher viscosity): Provide better protection in high temperatures and are suitable for summer riding.
Your motorcycle’s owner’s manual will specify the recommended oil viscosity grade. Using the wrong type of oil can lead to decreased engine performance and potential damage.
Synthetic vs. Conventional Oil
Another factor to consider is whether to use synthetic or conventional oil. Synthetic oil is engineered for superior performance and longevity, but it’s more expensive. Conventional oil is more affordable, but it requires more frequent changes. Consult your owner’s manual and mechanic for guidance on the best type of oil for your motorcycle.
Troubleshooting Common Oil Check Issues
- Oil level is too low: This could indicate an oil leak or excessive oil consumption. If you consistently find your oil level low, consult a mechanic to diagnose the issue.
- Oil level is too high: Overfilling your oil can cause engine damage. If you accidentally overfill, drain some oil until the level is within the correct range.
- Oil looks milky or frothy: This could indicate a coolant leak into the oil. If you see this, immediately consult a mechanic.
- Oil smells burnt: This could indicate engine overheating or oil breakdown. Have your motorcycle checked by a mechanic to identify and address the problem.

The Role of Oil Filters
Don’t forget about your oil filter! It plays a crucial role in keeping your oil clean and free of debris. Most manufacturers recommend changing your oil filter every other oil change or as specified in the owner’s manual.
Keeping a record of your oil checks and changes can be beneficial. Note the date, mileage, and oil level each time you check or change your oil. This helps you track your motorcycle’s oil consumption and can be useful information for your mechanic.
Professional Assistance: When in Doubt
If you’re unsure about any aspect of checking your motorcycle’s oil, or if you notice any unusual signs, don’t hesitate to consult a qualified mechanic. They can diagnose any potential problems and ensure your bike is in top running condition.
Remember, maintaining your motorcycle’s oil is a simple yet crucial task that can significantly impact its performance and longevity. By following the steps outlined in this guide and being proactive about your bike’s maintenance, you can enjoy countless miles of worry-free riding.